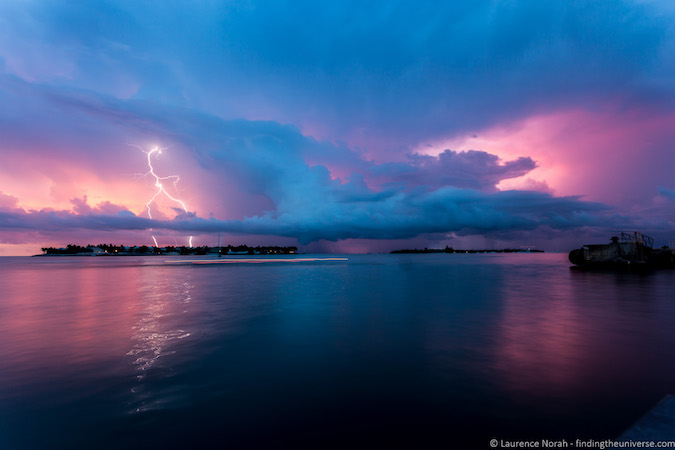
The photographs of the place we visit are the treasure memory that we
can keep, for us to have the opportunity to look back in time to see all the
good things that happened to us. One of the most misunderstood parts of digital
photography is what happens after you take the shot: the post-processing. This
is where you edit the images you have taken, to create the final product. Here
are the steps that you should do and follow when editing your photographs to
make it perfect, beautiful image and its quality can last longer.
·
Cropping.
This is the basic thing to do in your photographs. In cropping a picture, there
are a lot of reasons that you should consider. For example, you want to make a
rectangular image to a square, and then cropping is the best way to do. When
you are cropping make sure to crop the things that are irrelevant to the image.
In that way you can focus on what you really want to be seen on the image.
Cropping your image will also make your image clearer, because in cropping you
can remove the dark spots on the image. It will also focus more on your
subject. You are going why I shouldn’t do this when taking photos, it is
because when zooming an image while taking a picture, makes the image blurred
and don’t have a good quality unless you have a good camera.
·
Leveling.
When we are taking a photo, this is the most forgotten part to maintain the
photo in a horizontal line. Sometimes it is very hard to maintain its level,
because when you are taking a photo you are not really focusing on the rules,
rather you are focusing more in the subject that you are taking. Thank you to
editing again, because it allows us to edit it and align it in the horizontal
axis. Maintaining it alignment on the horizontal axis, when your image is
aligned perfectly it leaves also a good representation of your image. Don’t
worry, because when we level our image it isn’t that hard, depending on the
editing software you will use. There are a lot of software you can use to make
it easier.
·
Vignetting. Vignetting is about making parts of the image
darker or lighter than other parts, in order to make it clearer what the
subject of the shot is. Some tools restrict your vignette to the corners, but
in applications like Snap seed and Light room you can selectively darken and
lighten areas of the image — you don’t need to restrict yourself to the
corners. Vignetting is particularly good for portraits, and anywhere where you
really want to make the subject of the image more clearly obvious to the
viewer. It is the best thing about vignetting your image, because it adds more
beauty and finest to the pictures. It’s okay to add darkness and lightness to
the picture, whether they are present or not. This is the most used techniques
in all editing skills.
·
·
Shadows
and highlights. Sometimes when we take a photograph, parts of the shot
might end up being darker or brighter than we want. We refer to the dark areas
of the shot as shadows, and the bright areas of the shot as highlights. We can
fix this by changing the brightness of the shadow and highlight areas
specifically, using either the “Shadow” or “Highlight” tool. This is a tool
that works particularly well on RAW files as they retain more information on
the shadow and highlight areas of an image compared to a compressed JPEG, which
discards most of this information in order to save file size. This is very
exciting part of editing also, because you are brightening or lightening the
image that are too dark and light. This step will also add up beauty to the
image. Make sure that when you are adjusting brightness to your image, make sure
that you don’t brighten up too much.
·
Adjust
the Contrast. Adjusting the contrast and the color of your image, will add
beauty to the image. The color contrast of the image is very important factor
in your image. The colors of the image and making its color boundaries clearer,
making the image more attractive. In most shots, you only want to tweak the
contrast a little bit to get the desired effect, normally no more than +20 or
so, but in this case the higher number gave the best result.
·
Colors.
This is one of the most important things in your editing kit, because it gives
more life and emotion in your images. Another good thing about editing the
colors of your images is through adjusting the hue, saturation and warmness to
the image. When you are adjusting the colors of the image make sure that you
don’t make it too much dark, or light. The colors you are using should be
complementing each color. Making it too dark and too colorful will remove the
message you want to bring to the people who will see it. As with many edits,
the key is to find a good balance — oversaturated images tend to look rather
unnatural. DE saturated images can be very effective, and of course
black-and-white is an excellent choice for all sorts of situations, in
particular, portraits, architecture, and certain landscape scenes. But
generally you would want to find a happy midpoint: not too oversaturated and
not too under saturated.
Just remember all these steps in editing your image. Editing isn’t
really must do, rather it is a thing that you should do if you want to make
your image perfect and much beautiful to see by our eyes. These editing skills
should be stick in your mind, whenever you decided to edit it.
| Check
and learn more how World Ventures can
turn dream to reality! |
No comments:
Post a Comment